In this post, we are going to discuss, how to bind Javascript code to Android code that means you can call your Android code from your Javascript function.
Android WebView allows us to display web pages inside the application. Also allowed to interact with web content, there are several reasons that you might want to use WebView in your applications. It is powerful enough to execute JavaScript. Webviews are wonderful and offer us incredible scale, flexibility, freedom, and happiness.
So while using Webview, you need to track the user’s action, for example, you want to take specific action when a user clicks on the image or button or link. Javascript helps you to track this kind of events. By creating a simple interface you can bind your JavaScript code and client-side Android code.
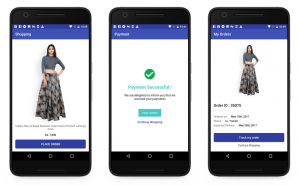
So let’s start this by creating a simple app. It will show you how to catch the callback from the Javascript.
Steps to follow:
1. To use WebView, declare the following the following code in the xml file.
| <WebView | |
| android:id="@+id/webView" | |
| android:layout_width="match_parent" | |
| android:layout_height="match_parent" /> |
- In order to access the Internet and load web pages in a WebView, you must add the following permissions to your AndroidManifest.xml file:
| <uses-permission android:name="android.permission.INTERNET" /> | |
| <uses-permission android:name="android.permission.ACCESS_NETWORK_STATE" /> |
3. For the client, to receive callbacks from JS there must be a Javascript interface class inside it which will implement the callbacks. The callbacks must have the same name and the same number of arguments as called through JS. You must add @JavascriptInterface annotation to all the methods inside the JS interface class.
| public class JavaScriptReceiver | |
| { | |
| Context mContext; | |
| /** Instantiate the receiver and set the context */ | |
| JavaScriptReceiver(Context c) { | |
| mContext = c; | |
| } | |
| @JavascriptInterface | |
| public void showShopping(){ | |
| Intent intent = new Intent(mContext, ShoppingActivity.class); | |
| mContext.startActivity(intent); | |
| } | |
| @JavascriptInterface | |
| public void showOrders(int orderid){ | |
| Intent intent = new Intent(mContext, MyOrdersActivity.class); | |
| intent.putExtra("order",orderid); | |
| mContext.startActivity(intent); | |
| } | |
| } |
- Now you need to initialize the webview, for this use the following snippet.
| WebView webView; | |
| webView = (WebView) findViewById(R.id.webView); | |
| embed_link = "http://droidmentor-app-callback.surge.sh/"; | |
| if (TextUtils.isEmpty(embed_link)) | |
| onBackPressed(); | |
| webView.setWebChromeClient(new WebChromeClient()); | |
| webView.getSettings().setDomStorageEnabled(true); | |
| webView.getSettings().setJavaScriptEnabled(true); |
- Then, In your javascript add the calling statement. Use the same interface and function name in the calling statement. The following HTML code explains this thing.
| <script> | |
| function getRandomNumber(min,max) { | |
| return Math.floor( Math.random() * ( 1 + min – max ) ) + max; | |
| } | |
| function showOrders() { | |
| var number = getRandomNumber(10000,50000) | |
| JSReceiver.showOrders(number); | |
| } | |
| function showShopping() { | |
| JSReceiver.showShopping(); | |
| } | |
| </script> | |
| <a href="#" class="btn-view-orders" onclick="showOrders()">View Orders</a> | |
| <a href="#" onclick="showShopping()">Continue Shopping</a> |
- Now you need to bind the JS code and the Android code, for this you just simply use addJavascriptInterface() method in the webview as follows.
| JavaScriptReceiver javaScriptReceiver; | |
| javaScriptReceiver = new JavaScriptReceiver(this); | |
| webView.addJavascriptInterface(javaScriptReceiver, "JSReceiver"); |
I created a project on GitHub to demonstrate the things covered in this article.
If you find the article useful, please recommend it. Feel free to comment and share, keep watching this space get more updates on Android Stuff!
Jaison Fernando
Latest posts by Jaison Fernando (see all)
- Phone number auth using Firebase Authentication SDK - March 20, 2020
- Password-less email auth using Firebase Authentication SDK - March 9, 2020
- How to use SharedPreferences API in Android? - February 10, 2020