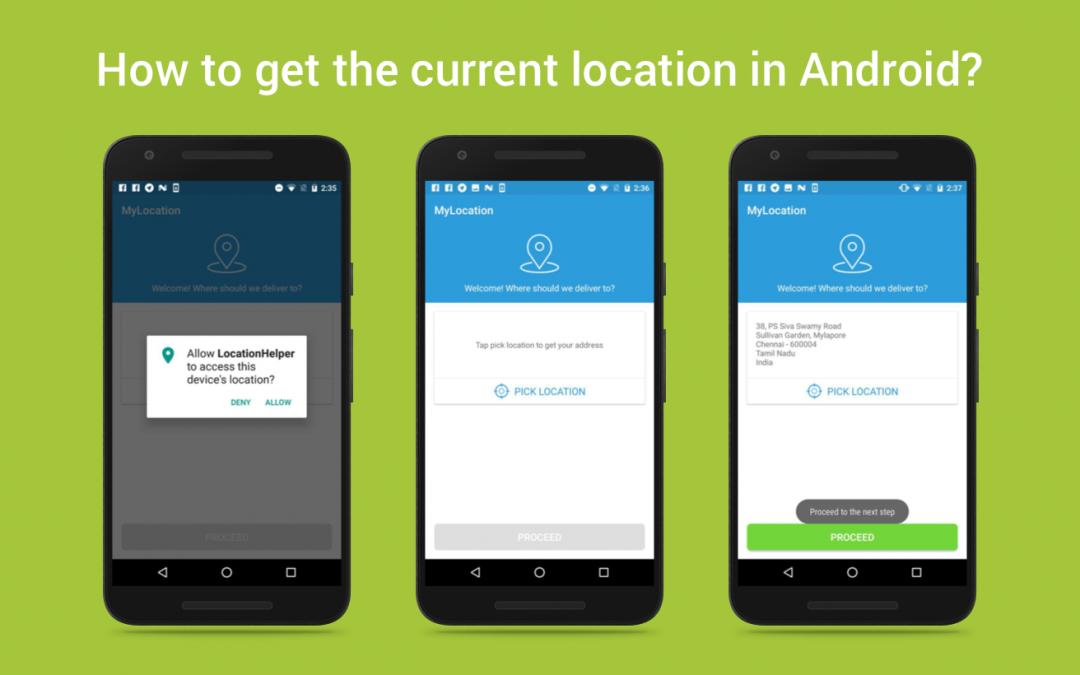
Knowing a user’s location in an Android app can be extremely useful. Users take their devices everywhere and are constantly using them on the go, and as developers, we can capitalise on that by providing a more contextual experience based on their current location.
In this article, we are going to see how to get user’s current location using FusedLocationProviderApi.
Why we use FusedLocationApi?
- It provides simple and easy to use APIs.
- Provides high accuracy over other options.
- Utilises low power by choosing the most efficient way to access the location.
Getting current location through this API is a bit tricky to implement, but No worries the below step-by-step guidelines will explain the procedure.
1. Basic setup:
Here we are going to use the Google Play Services API, so first, we need to setup our project with the Google Play services SDK. If you haven’t installed it yet, get it now by using the following instructions.
- Go to Android Studio > Tools > Android > SDK Manager .
- Update the Android Studio SDK Manager: click SDK Tools, expand Support Repository, select Google Repository, and then click OK.
Then open your build.gradle (module) and add the following dependency.
| compile 'com.google.android.gms:play-services-location:16.0.0' |
Now you need to add the following permissions into the AndroidManifest.xml file.
| <uses-permission android:name="android.permission.ACCESS_FINE_LOCATION" /> | |
| <uses-permission android:name="android.permission.ACCESS_COARSE_LOCATION" /> |
2. Permission check:
From Android 6.0 user can deny the permission request, so before try to get the location we need to check the status of the location access. For checking the permissions during the runtime please check out my blog.
For this, you can use the following set of code:
| ArrayList<String> permissions=new ArrayList<>(); | |
| PermissionUtils permissionUtils; | |
| permissionUtils=new PermissionUtils(MyLocationUsingLocationAPI.this); | |
| permissions.add(Manifest.permission.ACCESS_FINE_LOCATION); | |
| permissions.add(Manifest.permission.ACCESS_COARSE_LOCATION); | |
| permissionUtils.check_permission(permissions,"Need GPS permission for getting your location",1); |
3. Accessing Google API:
For making a connection with Location API which is provided in the Google Play services library, we need to create an instance of GoogleApiCLient. The Google API Client provides a common entry point to all the Google Play services and manages the network connection between the user’s device and each Google service.
The following code that creates a GoogleApiClient instance that connects with the Location service:
| GoogleApiClient mGoogleApiClient; | |
| mGoogleApiClient = new GoogleApiClient.Builder(this) | |
| .addConnectionCallbacks(this) | |
| .addOnConnectionFailedListener(this) | |
| .addApi(LocationServices.API).build(); | |
| mGoogleApiClient.connect(); |
4. Connection Management:
To begin an automatically managed connection, we must specify an implementation for the OnConnectionFailedListener interface to receive connection errors, and also we may specify an optional implementation for the ConnectionCallbacks interface to know when the automatically managed connection is established or suspended.
The following code will explain about this connection management.
| public class MyLocationUsingLocationAPI extends AppCompatActivity implements ConnectionCallbacks,OnConnectionFailedListener,OnRequestPermissionsResultCallback, | |
| PermissionResultCallback { | |
| @Override | |
| public void onConnectionFailed(ConnectionResult result) { | |
| Log.i(TAG, "Connection failed: ConnectionResult.getErrorCode() = "+ result.getErrorCode()); | |
| } | |
| @Override | |
| public void onConnected(Bundle arg0) { | |
| // Once connected with google api, get the location | |
| } | |
| @Override | |
| public void onConnectionSuspended(int arg0) { | |
| mGoogleApiClient.connect(); | |
| } | |
| } |
5. Receiving Location Updates:
For refreshing the location of the device at regular intervals, we need to use LocationRequest objects, which is used to request a quality of service for location updates from the FusedLocationProviderApi. For this location update, you can use the following snippet.
| LocationRequest mLocationRequest = new LocationRequest(); | |
| mLocationRequest.setInterval(10000); | |
| mLocationRequest.setFastestInterval(5000); | |
| mLocationRequest.setPriority(LocationRequest.PRIORITY_HIGH_ACCURACY); | |
| LocationSettingsRequest.Builder builder = new LocationSettingsRequest.Builder() | |
| .addLocationRequest(mLocationRequest); | |
| PendingResult<LocationSettingsResult> result = LocationServices.SettingsApi | |
| .checkLocationSettings(mGoogleApiClient, builder.build()); |
6. Check the play service availability:
To check the availability of google play service, we can follow the below set of code.
| private boolean checkPlayServices() { | |
| GoogleApiAvailability googleApiAvailability = GoogleApiAvailability.getInstance(); | |
| int resultCode = googleApiAvailability.isGooglePlayServicesAvailable(this); | |
| if (resultCode != ConnectionResult.SUCCESS) { | |
| if (googleApiAvailability.isUserResolvableError(resultCode)) { | |
| googleApiAvailability.getErrorDialog(this,resultCode, | |
| PLAY_SERVICES_REQUEST).show(); | |
| } else { | |
| Toast.makeText(getApplicationContext(), | |
| "This device is not supported.", Toast.LENGTH_LONG).show(); | |
| } | |
| return false; | |
| } | |
| return true; | |
| } |
7. Get the location:
Now we can get the last known location of the user’s device from the Location service as follows.
| mLastLocation = LocationServices.FusedLocationApi | |
| .getLastLocation(mGoogleApiClient); |
8. Get the address from the location(Reverse GeoCoding):
Using the Geocoder class we can get the address from the above location. The following code snippet helps you to do the reverse geocoding process.
| public Address getAddress(double latitude,double longitude) | |
| { | |
| Geocoder geocoder; | |
| List<Address> addresses; | |
| geocoder = new Geocoder(this, Locale.getDefault()); | |
| try { | |
| addresses = geocoder.getFromLocation(latitude,longitude, 1); // Here 1 represent max location result to returned, by documents it recommended 1 to 5 | |
| return addresses.get(0); | |
| } catch (IOException e) { | |
| e.printStackTrace(); | |
| } | |
| return null; | |
| } |
That’s it. Now you have the current location and also the address. Happy coding 🙂
I created a sample project on GitHub to demonstrate the things covered in this article.
After working on the same for many times I thought why not this be done with a single util class. It deserves a separate blog post. I’m planning to write one soon.
Feel free to comment and share, keep watching this space get more updates on Android Stuff!
Jaison Fernando
Latest posts by Jaison Fernando (see all)
- Phone number auth using Firebase Authentication SDK - March 20, 2020
- Password-less email auth using Firebase Authentication SDK - March 9, 2020
- How to use SharedPreferences API in Android? - February 10, 2020