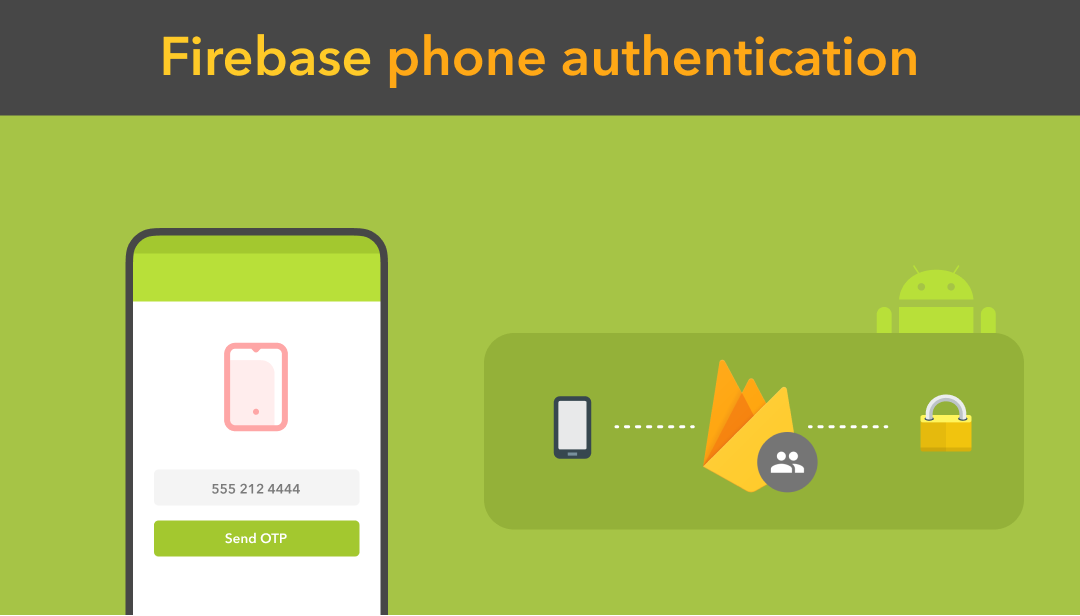
This tutorial covers the phone number authentication method in Android applications using Firebase Authentication SDK. Nowadays most of the apps have user profiling option, which allows the app to securely store the user data and provide the personalised experience across all of the user’s devices.
Firebase Authentication provides backend services, easy-to-use SDKs, and ready-made UI libraries to authenticate users to your app. It supports authentication using passwords, phone numbers, Email and popular identity providers like Google, Facebook and Twitter, and more.
In this tutorial, we will be learning about how to log in and authenticate in our Android application with the help of Firebase Auth phone number authentication method by sending an SMS message to the user’s phone.
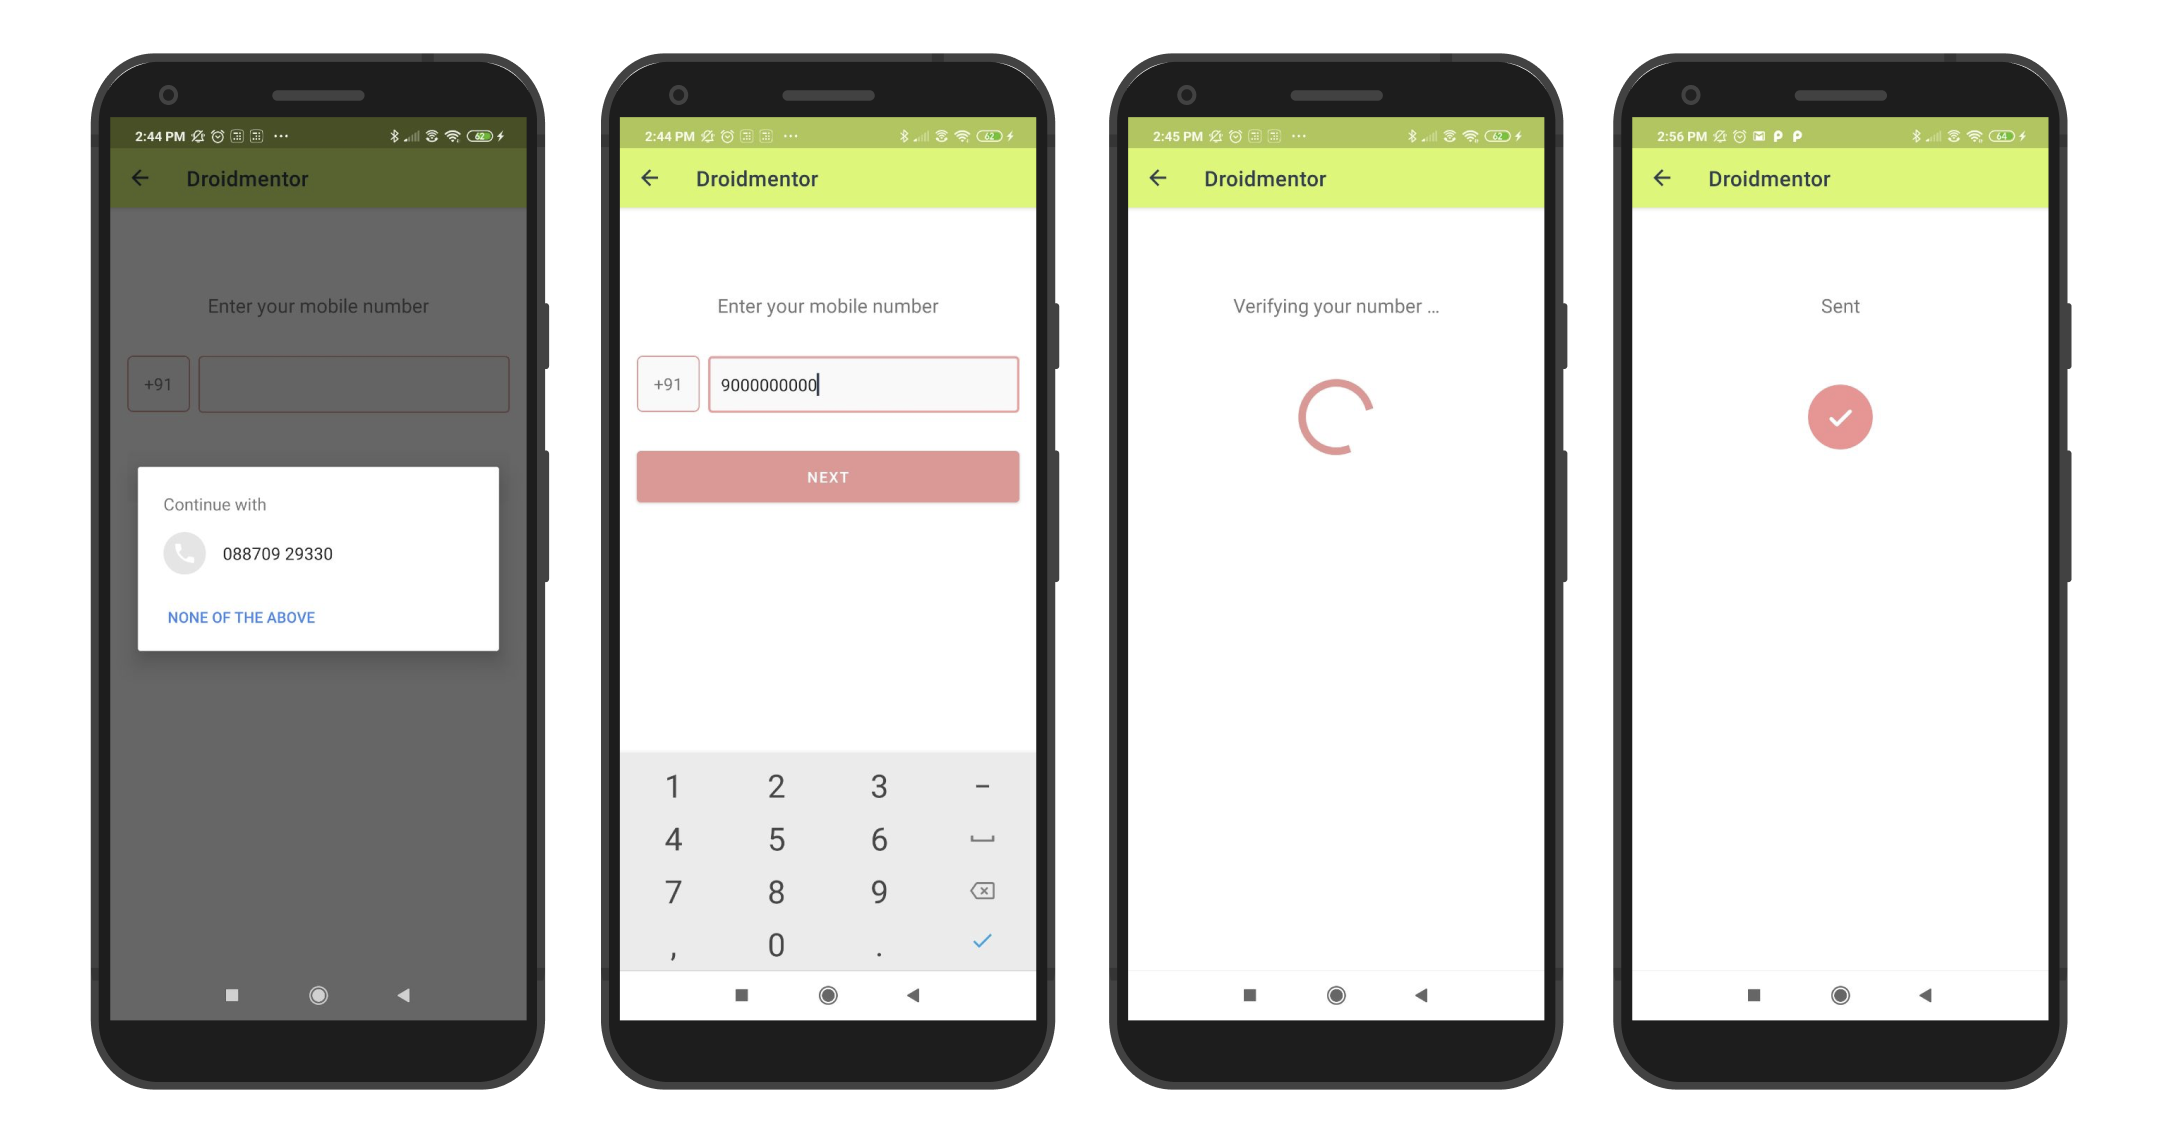
Password-less phone number authentication flow will be something like this:
- User has to enter their phone number along with the country code
- Initiate the verification flow by tapping the CTA
- Once the user clicks the CTA, a verification code is sent to the respective phone number.
- The user is requested to enter the verification code, received by SMS.
- Firebase validates the verification code, and create an account if the code is valid
- Let’s begin the implementation.
Prerequisites
To follow this tutorial, please make sure that you have the Google services enabled Android application and the Firebase application is created and ready to dive.
The first step is to, connect your application with Firebase project using Firebase assistant, you can just follow the official instructions because that’s pretty good.
Add the needed dependency in your build.gradle(app level)
| implementation 'com.google.android.gms:play-services-auth:17.0.0' | |
| implementation 'com.google.firebase:firebase-auth:19.2.0' |
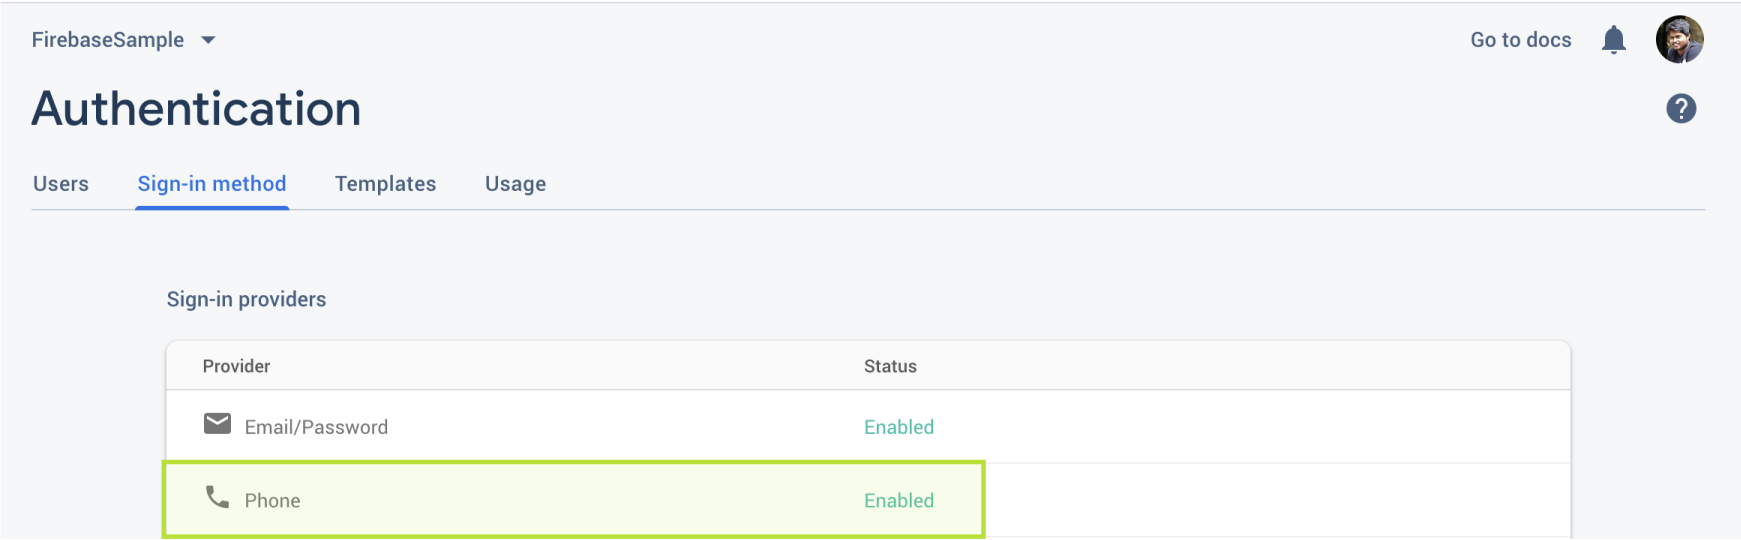
Enable the Phone authentication methodology in the Sign in method section in your Firebase console like below.
Add internet permission in the AndroidManifest.xml file.
| <uses-permission android:name="android.permission.INTERNET"/> | |
Connect Firebase Auth
We have already included the SDK , so we can jump straight into the implementation. Create FirebaseAuth instance and initialise it like this
| // Initialize Firebase Auth | |
| FirebaseAuth mAuth; | |
| mAuth = FirebaseAuth.getInstance(); | |
Initiate phone authentication
To send the verification code to the user’s mobile number we need to kick start the Firebase Auth library by calling the verifyPhoneNumber method along with the phone number and the verification code validity.
| PhoneAuthProvider.getInstance().verifyPhoneNumber( | |
| mobileNumber, // Phone number to verify | |
| 60, // Timeout duration | |
| TimeUnit.SECONDS, // Unit of timeout | |
| activity, // Activity (for callback binding) | |
| getVerificationCallback()); // OnVerificationStateChangedCallbacks | |
We’ll get the completion status in the callback functions and they are pretty self-explanatory, that’s it. Firebase Auth will take care of the rest.
| private OnVerificationStateChangedCallbacks getVerificationCallback() { | |
| if (verificationCallback == null) | |
| verificationCallback = new OnVerificationStateChangedCallbacks() { | |
| @Override | |
| public void onVerificationCompleted(@NonNull PhoneAuthCredential phoneAuthCredential) { | |
| Log.d(TAG, "onVerificationCompleted:" + phoneAuthCredential); | |
| } | |
| @Override | |
| public void onVerificationFailed(@NonNull FirebaseException e) { | |
| Log.w(TAG, "onVerificationFailed", e); | |
| if (e instanceof FirebaseAuthInvalidCredentialsException) { | |
| // Invalid request | |
| if (e.getLocalizedMessage().contains("The format of the phone number provided is incorrect.")) | |
| Log.d(TAG, "onVerificationFailed: The format of the phone number provided is incorrect.") | |
| else | |
| Log.d(TAG, "onVerificationFailed: Invalid credential"); | |
| } else if (e instanceof FirebaseTooManyRequestsException) { | |
| // The SMS quota for the project has been exceeded | |
| Log.d(TAG, "onVerificationFailed: FirebaseTooManyRequestsException"); | |
| } else | |
| Log.d(TAG, "onVerificationFailed"); | |
| } | |
| @Override | |
| public void onCodeSent(@NonNull String verificationId, | |
| @NonNull ForceResendingToken token) { | |
| // The SMS verification code has been sent to the provided phone number | |
| Log.d(TAG, "onCodeSent:" + verificationId) | |
| // Save verification ID and resending token so we can use them later | |
| mVerificationId = verificationId; | |
| resendingToken = token; | |
| } | |
| }; | |
| return verificationCallback; | |
| } | |
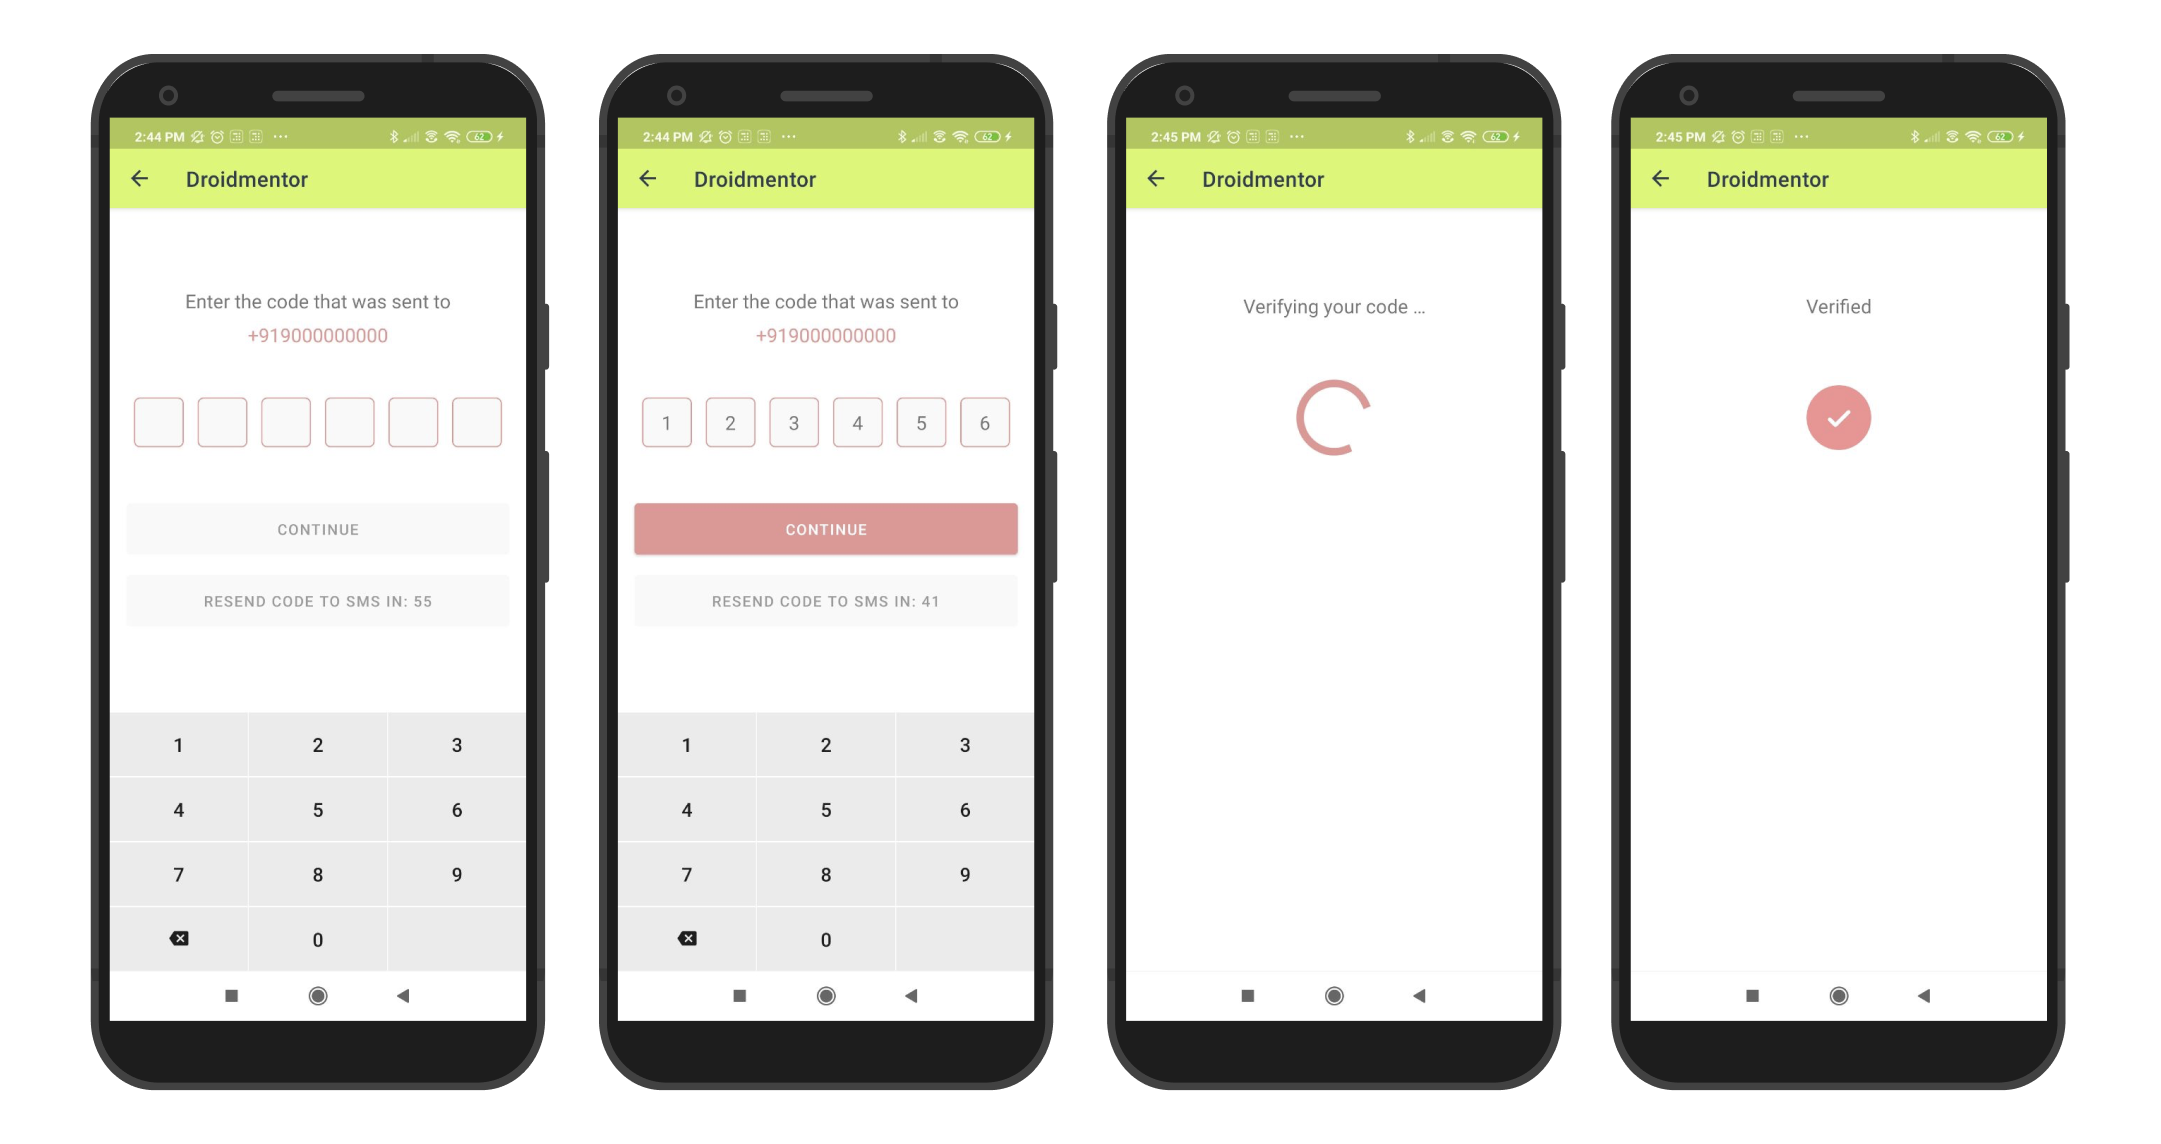
Now that you have your auth system setup in place, because when you complete all the above mentioned steps you’ll ends up with receiving verification code SMS from Firebase. Moving on, now, let’s handle the sign in process completion with the received verification code.
Verify the results
To complete the verification flow, ask the user to enter the received verification code in the respective fields, and create a PhoneAuthCredential object using the verification code and the verification ID received from the onCodeSent callback function.
| PhoneAuthCredential credential = PhoneAuthProvider.getCredential(mVerificationId, code); | |
Right after this, initiate the sign in process by by calling the signInWithCredential method along with the PhoneAuthCredential created from the above step
| mAuth.signInWithCredential(credential) | |
| .addOnCompleteListener(activity, new OnCompleteListener<AuthResult>() { | |
| @Override | |
| public void onComplete(@NonNull Task<AuthResult> task) { | |
| if (task.isSuccessful()) { | |
| // Sign in success, update UI with the signed-in user's information | |
| Log.d(TAG, "signInWithCredential:success"); | |
| if (task.getResult() != null) { | |
| FirebaseUser user = task.getResult().getUser(); | |
| if (user != null && !TextUtils.isEmpty(user.getPhoneNumber())) | |
| Log.d(TAG, "signInWithCredential: " + user.getPhoneNumber()); | |
| } | |
| } else { | |
| // Sign in failed, display a message and update the UI | |
| Log.w(TAG, "signInWithCredential:failure", task.getException()); | |
| if (task.getException() instanceof FirebaseAuthInvalidCredentialsException) { | |
| // Invalid request | |
| Log.d(TAG, "signInWithCredential: Invalid"); | |
| } else if (task.getException() instanceof FirebaseTooManyRequestsException) { | |
| // The SMS quota for the project has been exceeded | |
| Log.d(TAG, "signInWithCredential: FirebaseTooManyRequestsException"); | |
| } else | |
| Log.d(TAG, "signInWithCredential: Failed"); | |
| } | |
| } | |
| }); | |
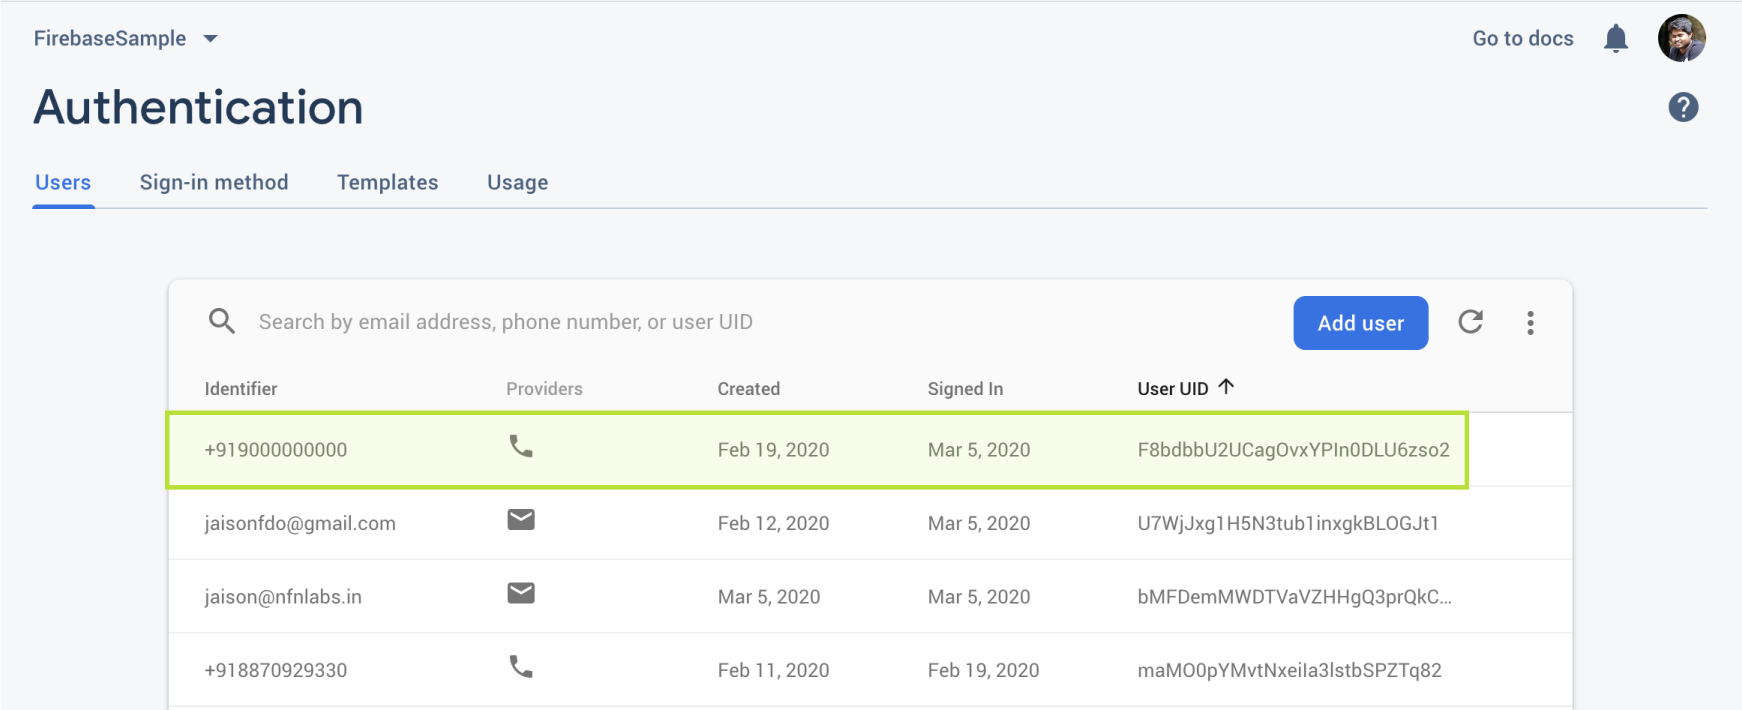
To verify that the user has been created, go to the Authentication -> Users screen in your Firebase console as shown below and find the user’s record.
Resend the verification code
The chance of the verification code not reaching the phone is high, due to the factors like server error, phone network issues. So its always good to have a resend code option, rather than going back to the beginning of the process and doing the whole thing again. To resend the verification code, we have to use the ForeceResnedingToken which we received from the onCodeSent callback function.
| if (resendingToken != null) { | |
| PhoneAuthProvider.getInstance().verifyPhoneNumber( | |
| mobileNumber, // Phone number to verify | |
| 60, // Timeout duration | |
| TimeUnit.SECONDS, // Unit of timeout | |
| activity, // Activity (for callback binding) | |
| getVerificationCallback(), // OnVerificationStateChangedCallbacks | |
| resendingToken); // Resending token received from onCodeSent callback | |
| } | |
Bonus
As of now, due to security concerns, we can’t change the SMS template, but the Firebase team provide the option to change the language to provide the localisation support, to use this specific feature, all we need to do is
| // For example use *es* for Spanish | |
| mAuth.setLanguageCode("YOUR_LANGUAGE_CODE"); |
To prevent abuse, Firebase enforces a limit on the number of SMS messages that can be sent to a single phone number within a period of time. If you exceed this limit, phone number verification requests might be throttled. To avoid this issue during development, you can add your number into the whitelisted phone numbers and make use of it.

Wrapping up
You have now successfully integrated simple authentication flow using Firebase Auth in your Android application and it’s working now.
After working with the very same verification flow for multiple times, ends with handling the following states with part of this implementation
- Input field for the phone number and the Hint suggestion
- Verification in progress state
- Verification code sent
- Resend the verification code
- Verification code input state
- Verification completion
I have created a reusable component to handle this Firebase Auth process and another component to handle all the intermediate screens using ViewStub.
If you need to take a look at the code for this, you can refer to this GitHub repo and it should work well after adding it to your Firebase Project.
That’s it for now. If you have any questions or suggestions (like use cases you want to be covered) don’t hesitate to write them in the comments.
Happy coding!
Jaison Fernando
Latest posts by Jaison Fernando (see all)
- Phone number auth using Firebase Authentication SDK - March 20, 2020
- Password-less email auth using Firebase Authentication SDK - March 9, 2020
- How to use SharedPreferences API in Android? - February 10, 2020