This article provides information to help you optimise your app’s launch time using launch screen. The launch screen is a user’s first experience of your application. Users expect apps to be responsive and fast to load. An app with a slow startup time doesn’t meet this expectation and can be disappointing to users.
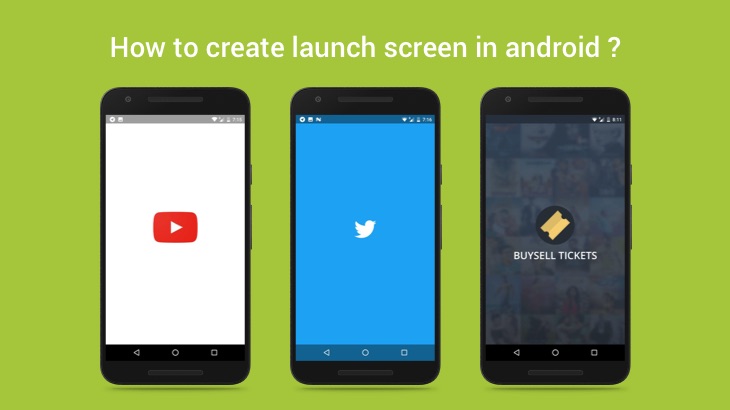
Types of launch screens :
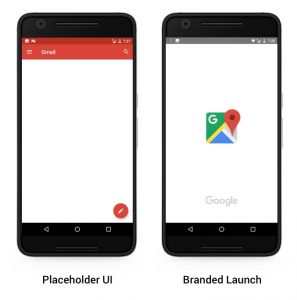
There are two types of launch screens available, they are listed below
1. Placeholder UI : It is the most seamless launch transition – appropriate for both app launches and in-app activity transitions. It’s for apps that have very short load times, or don’t have a strong branding need.
2. Branded Launch : It provides momentary brand exposure, freeing the UI to focus on content. It takes advantage of the loading time to display your logo or other elements that improve brand recognition.
Why we need launch screens ?
Launch screen is an image that takes the entire screen space and usually shows branding information about the application. Depending on the size of your app and what you’re doing in your Application’s onCreate(), there may be a lag between when the user starts your app and your Activity’s onCreate() is actually called. During that time, the window manager makes its best effort to draw a placeholder UI using elements from your theme such as the background and status bar colour.
How to create & implement launch screen ?
For adding launch screen into your app, you need to follow these steps.
- Create a drawable for your activity window background.
- Create a new theme that will show the drawable.
- Adding a new activity applied with the defined theme(in step 2), it will be used as the splash screen.
- If you need time delay you can use Timer or Handler.
- Finally, change this activity as a launcher activity using AndroidManifest.
Implementation :
1.First, create an XML drawable in res/drawable. For this, you can use the following snippet.
| <?xml version="1.0" encoding="utf-8"?> | |
| <layer-list xmlns:android="http://schemas.android.com/apk/res/android"> | |
| <!– launcher Screen Background (Color/Image) –> | |
| <item android:drawable="@drawable/ic_background1" /> | |
| <!– App Logo which comes center of the Screen due to gravity:"center" –> | |
| <item> | |
| <bitmap | |
| android:gravity="center" | |
| android:src="@drawable/ic_logo" /> | |
| </item> | |
| </layer-list> |
- Define your launcher theme.
| <style name="aluncher_theme" parent="Theme.AppCompat.NoActionBar"> | |
| <item name="android:windowBackground">@drawable/launch_screen</item> | |
| </style> |
- Add launcher activity with time delay using the handler, use the below code.
| public class LauncherActivity extends Activity { | |
| // launcher screen timer | |
| private static int SPLASH_TIME_OUT = 1000; | |
| Handler handler; | |
| Runnable runnable; | |
| @Override | |
| protected void onCreate(Bundle savedInstanceState) { | |
| super.onCreate(savedInstanceState); | |
| handler = new Handler(); | |
| runnable = new Runnable() | |
| { | |
| @Override | |
| public void run() | |
| { | |
| Intent home_activity=new Intent(LauncherActivity.this,HomepageActivity.class); | |
| startActivity(home_activity); | |
| finish(); | |
| } | |
| }; | |
| handler.postDelayed(runnable, SPLASH_TIME_OUT); | |
| } | |
| @Override | |
| public void onBackPressed() { | |
| super.onBackPressed(); | |
| handler.removeCallbacks(runnable); | |
| } | |
| } |
- Applying theme and set activity as a launcher activity.
| <activity android:name=".LauncherActivity" | |
| android:theme="@style/launcher_theme" | |
| android:screenOrientation="portrait"> | |
| <intent-filter> | |
| <action android:name="android.intent.action.MAIN" /> | |
| <category android:name="android.intent.category.LAUNCHER" /> | |
| </intent-filter> | |
| </activity> |
This sample code is available as a Gist over on GitHub if you want to check it out.
View GistFeel free to comment and share, keep watching this space get more updates on Android Stuff!
Jaison Fernando
Latest posts by Jaison Fernando (see all)
- Phone number auth using Firebase Authentication SDK - March 20, 2020
- Password-less email auth using Firebase Authentication SDK - March 9, 2020
- How to use SharedPreferences API in Android? - February 10, 2020