In this post, we are going to explore Android Snackbar with a sample application.
In Android Lollipop, they introduced a widget called SnackBar with their design support library. It is super easy to implement and used to show messages to the users. In pre-lollipop versions, we used “Toast”. It shows the status of the action which is initiated by the user. It appears and disappears entirely on its own.
I guess you have multiple queries in your mind like Why I need to adopt Snackbar? How to show? and How to customise it?. No worries you will receive the answers in this article. But let’s take one at a time.
Why do I need to adopt Snackbar?
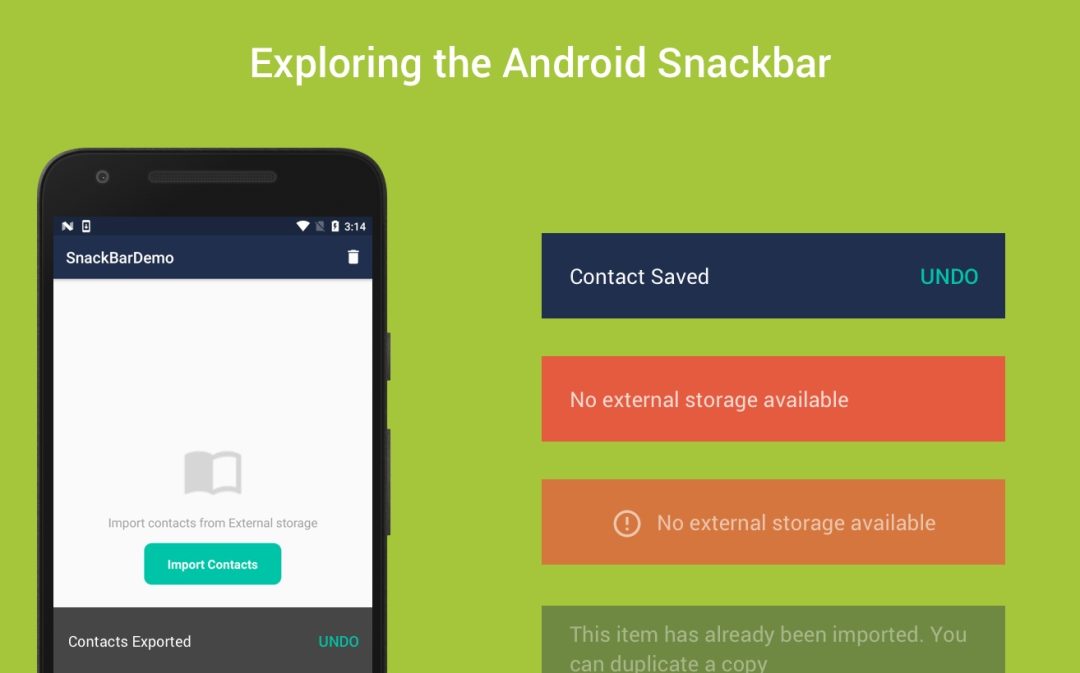
Snackbar provide lightweight feedback about operations by displaying a brief message to users at the bottom of the screen, and the user can swipe it away – or not. If they do nothing, it will time out on its own and automatically disappear. And the major advantage is you can add an action in it.
How to show?
The first step is to add Android design support library as a dependency in your build.gradle file:
| implementation 'com.android.support:design:27.1.0' |
Next step is to add a view in your XML layout. If it is a CoordinatorLayout then you can get some added features like swipe-to-dismiss and automatically be moving of widgets like FloatingActionButton.
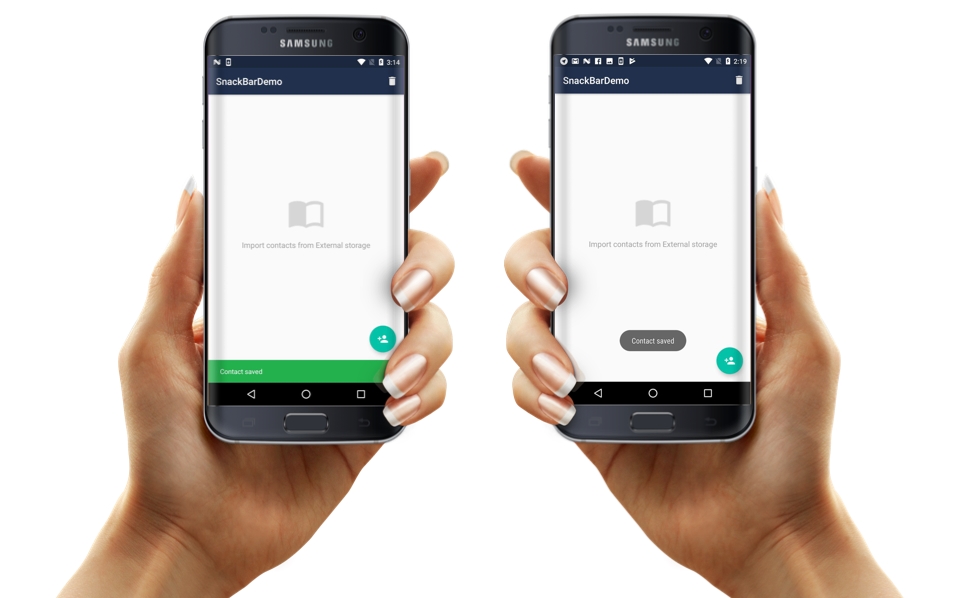
Similar to a Toast, there’s a make() and a show(). You can just call a snackbar directly like this.
| Snackbar.make(view, "Message", SNACKBAR_DURATION).show(); |

As I mentioned earlier, we can add an action button to it by using the following code snippet.
| public void deleteContact() | |
| { | |
| Snackbar snackbar = Snackbar | |
| .make(coordinatorLayout, "Contact removed",SNACKBAR_DURATION) | |
| .setAction("UNDO", new View.OnClickListener() { | |
| @Override | |
| public void onClick(View view) { | |
| Log.d("", " The contact is restored "); | |
| } | |
| }); | |
| View snackView = snackbar.getView(); | |
| snackView.setBackgroundColor(ContextCompat.getColor(this, R.color.snackBarBg)); | |
| TextView snackViewText = (TextView) snackView.findViewById(android.support.design.R.id.snackbar_text); | |
| snackViewText.setTextColor(ContextCompat.getColor(this, R.color.colorWhite)); | |
| Button snackViewButton = (Button) snackView.findViewById(android.support.design.R.id.snackbar_action); | |
| snackViewButton.setTextColor(ContextCompat.getColor(this, R.color.colorAccent)); | |
| // You can replace the above lines by using the below single line | |
| //snackbar=SnackBarUtil.getColorfulSnackBar(snackbar,this,R.color.snackBarBg,R.color.colorWhite,R.color.colorAccent); | |
| snackbar.show(); | |
| } |
The above-mentioned code also explains how to change the text colour and background colour. I just create a simple util class “SnackBarUtil“, which will help you to customise the snackbar easily.
How to customise a snackbar layout?
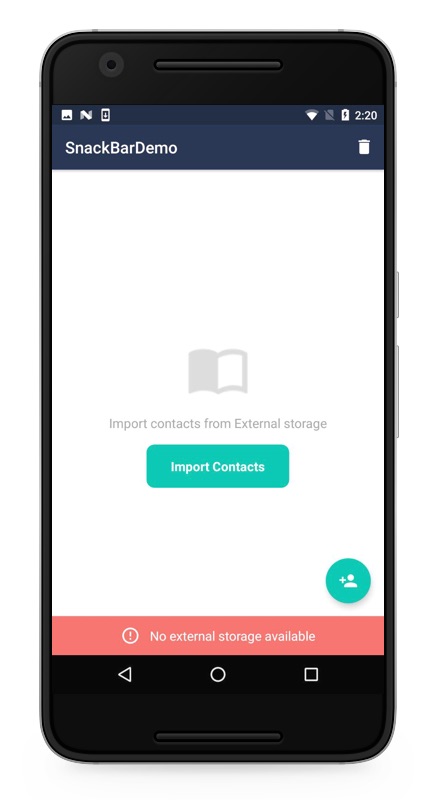
The previous example shows the minor customization like changing text colour and background. But in Android, we can customise the entire widget viewport by inflating our own view. For this, we are going to use the following code segment.
| public void checkStorage() | |
| { | |
| final Snackbar customSnackBar = Snackbar.make(coordinatorLayout, "", SNACKBAR_DURATION); | |
| Snackbar.SnackbarLayout layout = (Snackbar.SnackbarLayout) customSnackBar.getView(); | |
| View customsnackView = getLayoutInflater().inflate(R.layout.storage_check, null); | |
| TextView tvConnection = (TextView) customsnackView.findViewById(R.id.tv_connection); | |
| ImageView ivConnection = (ImageView) customsnackView.findViewById(R.id.iv_connection); | |
| // We can also customize the above controls | |
| layout.setPadding(0,0,0,0); | |
| layout.addView(customsnackView, 0); | |
| customSnackBar.show(); | |
| } |
That’s it. Happy coding ????
The source code is available on GitHub, use the below links to get the application.
Let’s Build Better Apps… Enjoy! 🙂
Feel free to comment and share, keep watching this space get more updates on Android Stuff!
Jaison Fernando
Latest posts by Jaison Fernando (see all)
- Phone number auth using Firebase Authentication SDK - March 20, 2020
- Password-less email auth using Firebase Authentication SDK - March 9, 2020
- How to use SharedPreferences API in Android? - February 10, 2020