This article is a quick guide to get you started with Local Notifications in Android.
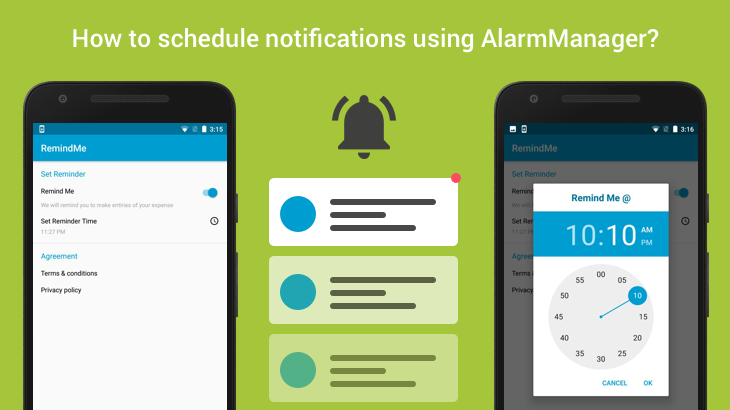
Scheduling and repeating notifications are generally used to notify the user about some event. For example, an expense tracking application can use a local reminder to notify their users to add daily expenses. Here I’m going to explain this concept with a sample application. I’ll be using AlarmManager to schedule local notifications in the above-mentioned demo app.
AlarmManager in Android:
AlarmManager is a class provides access to the system alarm services. It allows you to schedule your application to be run at some point in the future. Registered alarms are retained while the device is asleep, but will be cleared if it is turned off and rebooted. It is different from Timer and TimerTask.
Schedule repeating notifications:
Repeating alarms are a good choice for scheduling periodic notifications. A repeating alarm has the following characteristics:
- An alarm type – Android supports two clock types for alarm service ” elapsed real time ” and ” real time clock “(RTC). Elapsed real time uses the “time since system boot” as a reference, and real time clock uses UTC (wall clock) time.
- A trigger time – You have to specify the time to trigger the alarm. If the trigger time you specify is in the past, the alarm triggers immediately. So you need to handle this kind of scenario.
- The alarm’s interval. – Mention the time interval between the alarms.
- PendingIntent – It fires when the alarm is triggered.
The following code snippet is used to set repeating alarm.
| public static void setReminder(Context context,Class<?> cls,int hour, int min) | |
| { | |
| Calendar calendar = Calendar.getInstance(); | |
| Calendar setcalendar = Calendar.getInstance(); | |
| setcalendar.set(Calendar.HOUR_OF_DAY, hour); | |
| setcalendar.set(Calendar.MINUTE, min); | |
| setcalendar.set(Calendar.SECOND, 0); | |
| // cancel already scheduled reminders | |
| cancelReminder(context,cls); | |
| if(setcalendar.before(calendar)) | |
| setcalendar.add(Calendar.DATE,1); | |
| // Enable a receiver | |
| ComponentName receiver = new ComponentName(context, cls); | |
| PackageManager pm = context.getPackageManager(); | |
| pm.setComponentEnabledSetting(receiver, | |
| PackageManager.COMPONENT_ENABLED_STATE_ENABLED, | |
| PackageManager.DONT_KILL_APP); | |
| Intent intent1 = new Intent(context, cls); | |
| PendingIntent pendingIntent = PendingIntent.getBroadcast(context, | |
| DAILY_REMINDER_REQUEST_CODE, intent1, | |
| PendingIntent.FLAG_UPDATE_CURRENT); | |
| AlarmManager am = (AlarmManager) context.getSystemService(ALARM_SERVICE); | |
| am.setInexactRepeating(AlarmManager.RTC_WAKEUP, setcalendar.getTimeInMillis(), | |
| AlarmManager.INTERVAL_DAY, pendingIntent); | |
| } |
For setting trigger time you can get the input from the user using TimePickerDialog. The following set of code will hep you to get the time value.
| private void showTimePickerDialog(int h, int m) | |
| { | |
| LayoutInflater inflater = getLayoutInflater(); | |
| View view = inflater.inflate(R.layout.timepicker_header, null); | |
| TimePickerDialog builder = new TimePickerDialog(this, R.style.DialogTheme, | |
| new TimePickerDialog.OnTimeSetListener() { | |
| @Override | |
| public void onTimeSet(TimePicker timePicker, int hour, int min) { | |
| Log.d(TAG, "onTimeSet: hour " + hour); | |
| Log.d(TAG, "onTimeSet: min " + min); | |
| localData.set_hour(hour); | |
| localData.set_min(min); | |
| tvTime.setText(getFormatedTime(hour,min)); | |
| NotificationScheduler.setReminder(MainActivity.this,AlarmReceiver.class, | |
| localData.get_hour(),localData.get_min()); | |
| } | |
| }, h, m, false); | |
| builder.setCustomTitle(view); | |
| builder.show(); | |
| } |
Handling the broadcast:
We need to associate alarm service with the broadcast receiver. Alarm service will invoke this receiver on scheduled time. Here we can trigger the local notification with the respective details(title, content, icon). The below code will help you to handle the broadcast.
| public class AlarmReceiver extends BroadcastReceiver { | |
| String TAG = "AlarmReceiver"; | |
| @Override | |
| public void onReceive(Context context, Intent intent) { | |
| //Trigger the notification | |
| NotificationScheduler.showNotification(context, MainActivity.class, | |
| "You have 5 unwatched videos", "Watch them now?"); | |
| } | |
| } |
For this, you have to register the receiver in AndroidManifest.xml file. Using the following code
| <!-- Register the Alarm Receiver --> | |
| <receiver android:name=".AlarmReceiver"/> |
Now inside your onReceive() function, you need to initiate the notification.
| public static void showNotification(Context context,Class<?> cls,String title,String content) | |
| { | |
| Uri alarmSound = RingtoneManager.getDefaultUri(RingtoneManager.TYPE_NOTIFICATION); | |
| Intent notificationIntent = new Intent(context, cls); | |
| notificationIntent.setFlags(Intent.FLAG_ACTIVITY_CLEAR_TOP); | |
| TaskStackBuilder stackBuilder = TaskStackBuilder.create(context); | |
| stackBuilder.addParentStack(cls); | |
| stackBuilder.addNextIntent(notificationIntent); | |
| PendingIntent pendingIntent = stackBuilder.getPendingIntent( | |
| DAILY_REMINDER_REQUEST_CODE,PendingIntent.FLAG_UPDATE_CURRENT); | |
| NotificationCompat.Builder builder = new NotificationCompat.Builder(context); | |
| Notification notification = builder.setContentTitle(title) | |
| .setContentText(content).setAutoCancel(true) | |
| .setSound(alarmSound).setSmallIcon(R.mipmap.ic_launcher_round) | |
| .setContentIntent(pendingIntent).build(); | |
| NotificationManager notificationManager = (NotificationManager) | |
| context.getSystemService(Context.NOTIFICATION_SERVICE); | |
| notificationManager.notify(DAILY_REMINDER_REQUEST_CODE, notification); | |
| } |
Cancel an Alarm:

Depending on your app, you may want to add a function to cancel the alarm. To cancel the alarm, call the cancel() function in the Alarm Manager to send a PendingIntent that you do not want to operate anymore.
| public static void cancelReminder(Context context,Class<?> cls) | |
| { | |
| // Disable a receiver | |
| ComponentName receiver = new ComponentName(context, cls); | |
| PackageManager pm = context.getPackageManager(); | |
| pm.setComponentEnabledSetting(receiver, | |
| PackageManager.COMPONENT_ENABLED_STATE_DISABLED, | |
| PackageManager.DONT_KILL_APP); | |
| Intent intent1 = new Intent(context, cls); | |
| PendingIntent pendingIntent = PendingIntent.getBroadcast(context, | |
| DAILY_REMINDER_REQUEST_CODE, intent1, PendingIntent.FLAG_UPDATE_CURRENT); | |
| AlarmManager am = (AlarmManager) context.getSystemService(ALARM_SERVICE); | |
| am.cancel(pendingIntent); | |
| pendingIntent.cancel(); | |
| } |
Schedule repeating notifications on device reboot:

As I said earlier, the scheduled notifications will be cleared while device reboot.In this kind of scenarios user may lose the notifications. To prevent this from happening, you can automatically restart a repeating alarm if the user reboots the device. For this redesign, you need to follow the below instructions.
Add the following permission and the receiver changes in your AndroidManifest.xml file.
| <!-- permission required to automatically restart a | |
| repeating alarm if the user reboots the device --> | |
| <uses-permission android:name="android.permission.RECEIVE_BOOT_COMPLETED"/> | |
| <application> | |
| <!-- Register the Alarm Receiver --> | |
| <receiver android:name=".AlarmReceiver" | |
| android:enabled="false"> | |
| <intent-filter> | |
| <action android:name="android.intent.action.BOOT_COMPLETED" /> | |
| </intent-filter> | |
| </receiver> | |
| <application> |
Restart the repeating alarm using BroadcastReceiver.
| public class AlarmReceiver extends BroadcastReceiver { | |
| String TAG = "AlarmReceiver"; | |
| @Override | |
| public void onReceive(Context context, Intent intent) { | |
| if (intent.getAction() != null && context != null) { | |
| if (intent.getAction().equalsIgnoreCase(Intent.ACTION_BOOT_COMPLETED)) { | |
| // Set the alarm here. | |
| Log.d(TAG, "onReceive: BOOT_COMPLETED"); | |
| LocalData localData = new LocalData(context); | |
| NotificationScheduler.setReminder(context, AlarmReceiver.class, | |
| localData.get_hour(), localData.get_min()); | |
| return; | |
| } | |
| } | |
| //Trigger the notification | |
| NotificationScheduler.showNotification(context, MainActivity.class, | |
| "You have 5 unwatched videos", "Watch them now?"); | |
| } | |
| } |
In the manifest, the boot receiver is set to android:enabled=”false”. This means that the receiver will not be called unless the application explicitly enables it. This prevents the boot receiver from being called unnecessarily. You can enable a receiver as follows,
| // Enable a receiver | |
| ComponentName receiver = new ComponentName(context, cls); | |
| PackageManager pm = context.getPackageManager(); | |
| pm.setComponentEnabledSetting(receiver, | |
| PackageManager.COMPONENT_ENABLED_STATE_ENABLED, | |
| PackageManager.DONT_KILL_APP); |
And also you can disable the receiver, once we cancel the alarm using the below code.
| // Disable a receiver | |
| ComponentName receiver = new ComponentName(context, cls); | |
| PackageManager pm = context.getPackageManager(); | |
| pm.setComponentEnabledSetting(receiver, | |
| PackageManager.COMPONENT_ENABLED_STATE_DISABLED, | |
| PackageManager.DONT_KILL_APP); |
That’s it. Happy coding ????
Source code is available on GitHub, use the below links to get the application.
Feel free to comment and share, keep watching this space get more updates on Android Stuff!
Jaison Fernando
Latest posts by Jaison Fernando (see all)
- Phone number auth using Firebase Authentication SDK - March 20, 2020
- Password-less email auth using Firebase Authentication SDK - March 9, 2020
- How to use SharedPreferences API in Android? - February 10, 2020